Project Activation
Enabling a project

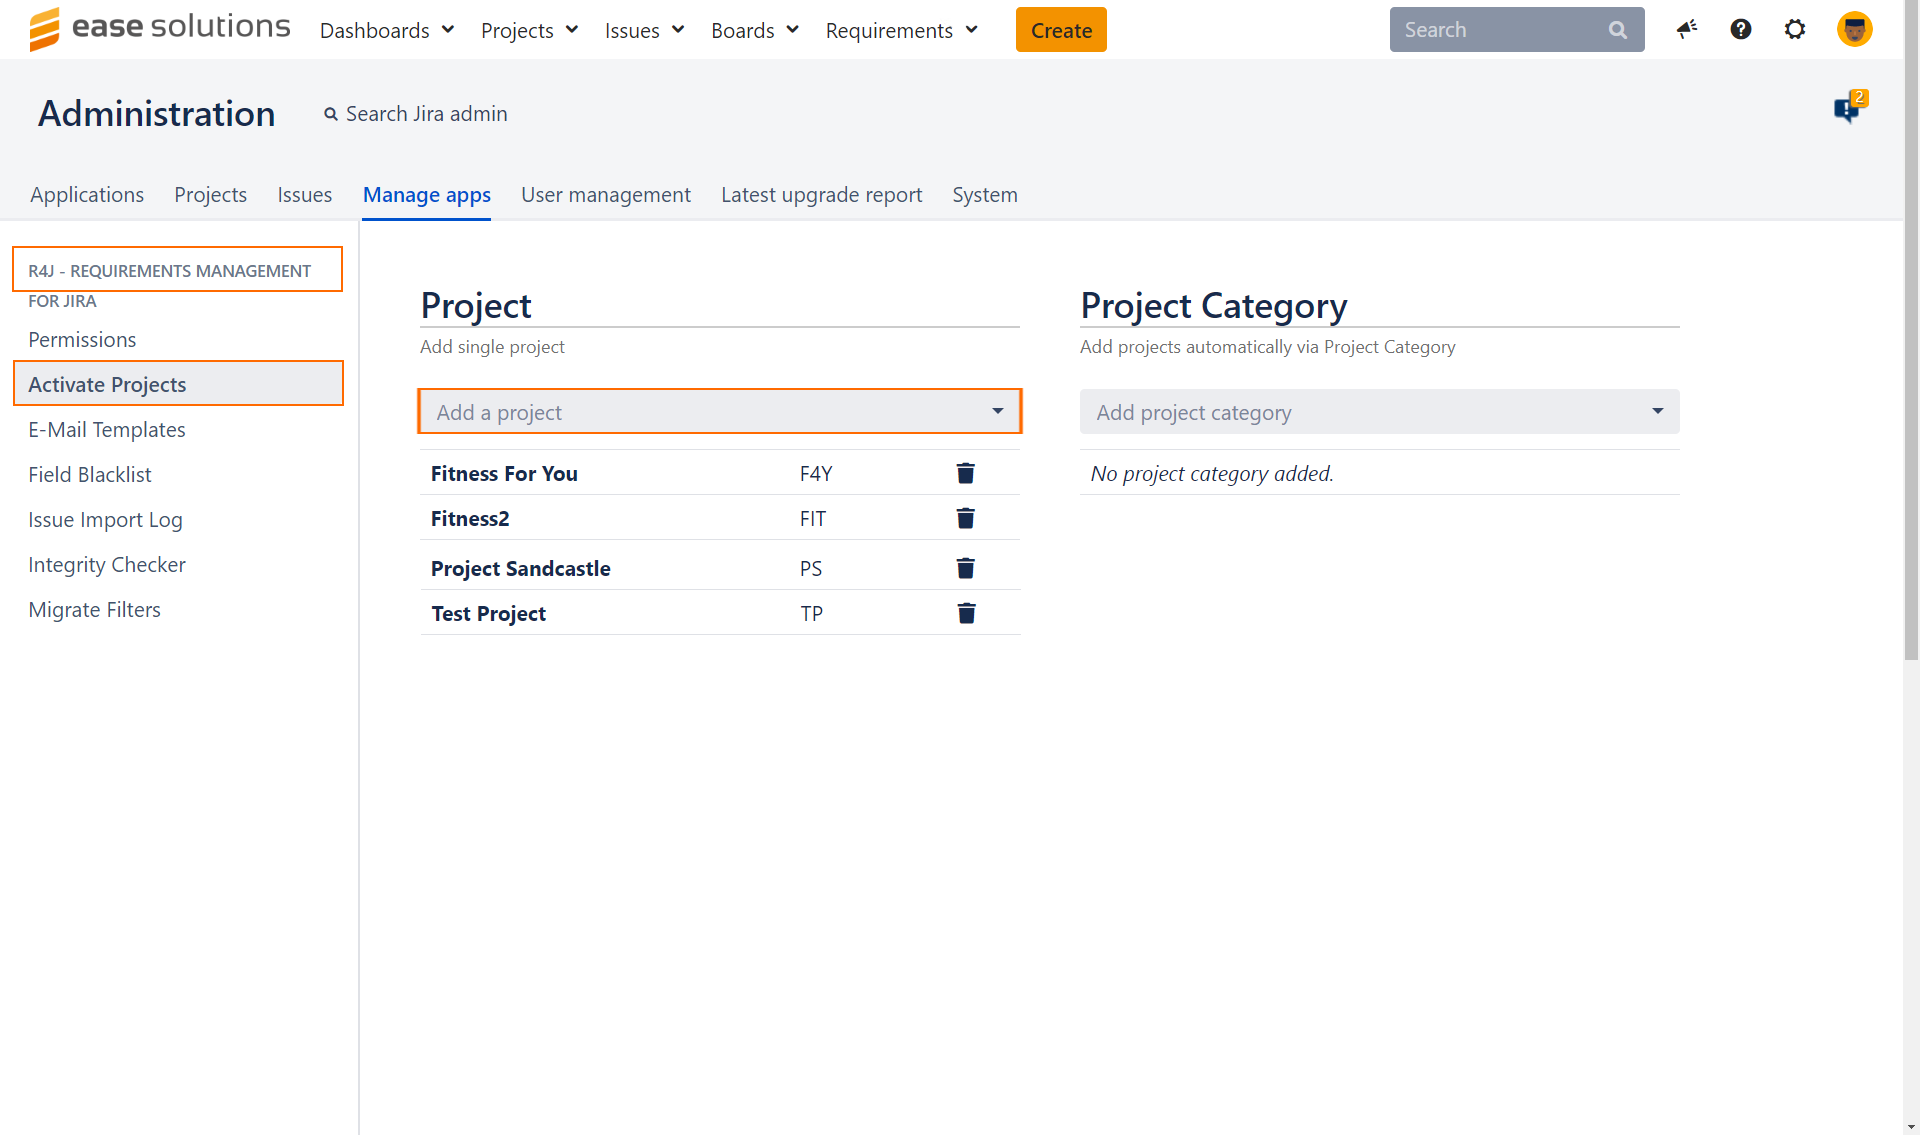
Login as Jira Administrator
Choose ⚙ > Manage apps
Select R4J - Requirements Management for Jira > Activate Projects from the sidebar
 Keyboard shortcut 'g' + 'g' + start typing 'Activate Projects'
In the Project section select a project from the dropdown menu to enable it for the use with the Requirements for JIRA plugin.
Alternatively, add project categories to automatically add any project with any of the given categories assigned.
Disabling a project
Login as Jira Administrator
Choose ⚙ > Manage apps
Select R4J - Requirements Management for Jira > Activate Projects from the sidebar
Keyboard shortcut 'g' + 'g' + start typing 'Activate Projects'In the Projects section locate the project you wish to disable
Click on the delete icon next to the project key to exclude it from R4J
Custom Field Types
R4J Issue Revision
Previously named "Issue Version" and renamed to "R4J Issue Revision" from version 4.2.2.
This custom field type is a read-only field which displays the current R4J revision number value for the issue – only works for projects that are enabled for R4J. To add
Login as Jira Administrator
Choose ⚙ > Issues
Select Fields > Custom fields from the sidebar
Keyboard shortcut 'g' + 'g' + start typing 'Custom fields'In the top right of the screen, click on the Add custom field button
Select All in the field type selection dialog and search for R4J Issue Revision
Click on next, fill-up the details and create the custom field type
Now, you can add this custom field to your project screen(s).
Recommendation: Add this field to the black list to avoid redundant information in the revision history.You can add this custom field into the Word and Excel export templates.