Context Menu Operations
The project tree consists of folders, issues and references to pages in Confluence. To access the context menu, right-click on any item in the tree. Each type of item has its own set of context menu entries for performing appropriate operations, as indicated in the following tables.
Folder operations
Availability | |||||
Root Folder | Other Folders | ||||
✅ | ✅ | Create issue | Opens the Jira Create Issue dialog. Select Create to create the new requirement or issue and add it to the selected folder. | ||
✅ | ✅ | Create folder | Opens the create folder dialog, where you enter a name and a description for the new folder. The names of folders within one parent folder must be unique. Select Create to create the new folder below the selected one. | ||
✅ | ✅ | Create baseline | Opens the create baseline dialog, which allows you to enter a name and an optional description for the new baseline. Select Create to create a new baseline for the folder. If a filter is applied to the tree, only issues that satisfy the filter are included in the baseline. | ||
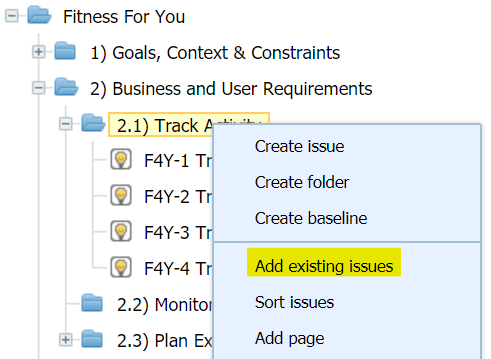
✅ | ✅ | Add existing issues | Opens the Add Existing Issues dialog, where the following possibilities are available:
Select the option Run scheduled to enable automatic import based on the selected source. Due to the fact that issues may only appear once in a project’s tree, any issues that are already in the tree (in some other folder), are ignored, even if they match a filter or are manually selected to be added to a given folder. Only filters shared with the requirements project, or in the categories “My“, “Favorite“ or “Popular“, may be used when selecting a filter.
| ||
✅ | ✅ | Sort issues | Opens the sort issues dialog, where you choose the issue field to sort by, as well as the sort order. Issues can be sorted by issue key, creation date, issue summary, issue type or priority. Select Sort to perform the operation. This operation is disabled while the tree is still loading. Only issues directly contained in the selected folder are sorted. The sort order of Issues in subfolders as well as any child requirements is not affected. | ||
✅ | ✅ | Add page | Opens the add Confluence page dialog, allowing you to search for existing pages in any linked Confluence instance. This operation is only available if Confluence Integration is enabled. | ||
❌ | ✅ | Get URL | Creates a URL for the selected folder or requirement. Opening the URL in a browser displays the project tree with the folder or requirement preselected. | ||
✅ | ✅ | Refresh folder | Refreshes the folder's content and fetches any updates from the server. | ||
✅ | ✅ | Show in issue navigator | Opens the Jira issue navigator in a new browser tab or window. All issues contained in the selected folder and its subfolders are displayed by applying a search query using the JQL function requirementsPath, provided by R4J. | ||
✅ | ✅ | Expand | Expands the selected folder and all subfolders. | ||
✅ | ✅ | Collapse all | Collapses the selected folder and all subfolders. | ||
❌ | ✅ | Cut | Stages one or more folders or requirements for pasting within the same project or to a different project. | ||
✅ | ✅ | Copy | Stages one or more folders or requirements for copying within the same project or to a different project. If a filter is applied to the tree, only issues that satisfy the filter are included in the staged items. | ||
✅ | ✅ | Paste | Pastes staged items to the selected folder, as follows:
This operation is disabled while the tree is still loading. | ||
✅ | ✅ | Properties | Opens the edit folder dialog. Folders are just a special type of Jira issue, made available by R4J, and their fields are edited in the same way as for other types of issues (except that the name of the root folder cannot be changed). R4J enhances the edit dialog with a statistics section showing, for example, the number of issues in a folder. You can add an image to a folder by attaching it to the folder. To make it visible in the Reading View , add a link to the image in the description. Note that R4J only allows images to be attached to folders, not other types of files. For existing folder you can assign a user as a watcher. This person will get notified for changes on the folder content: adding, moving, sorting, pasting, deleting of issues/folders/children inside the folder or update of folder name. | ||
❌ | ✅ | Delete | Opens the delete folder dialog. Removing folders from the tree removes all its subfolders and requirements recursively. They are not deleted in Jira and can be added again to the tree. | ||
Issue and page operations
Availability | |||
Issues | Pages | ||
✅ | ❌ | Edit issue | If the selection contains one issue the Jira Edit Issue dialog opens. If the selection contains multiple issues the Jira Bulk Edit dialog opens. |
✅ | ❌ | Create child issue | Opens the Jira Create Issue dialog. Select Create to create the new requirement or issue and add it as child of the selected requirement. |
✅ | ❌ | Create linked issue | Opens the Create Linked Issue dialog, which allows you to specify the the outgoing link type, as well as project in which the new issue should be created and the issue type of the new issue. Selecting Create opens the Jira Create Issue dialog, prefilled with the information entered in the dialog. Select Create to create a new issue of the chosen type in the chosen project, linked to the new issue with the chosen link type. |
✅ | ❌ | Add existing issues | Opens the Add Existing Issues dialog, where the following possibilities are available:
Select the option Run scheduled to enable automatic import based on the selected source. Due to the fact that issues may only appear once in a project’s tree, any issues that are already in the tree (in some other folder), are ignored, even if they match a filter or are manually selected to be added to a given folder. Only filters shared with the requirements project, or in the categories “My“, “Favorite“ or “Popular“, may be used when selecting a filter. |
✅ | ❌ | Add link | Opens the Add Link dialog, allowing you to add a Jira issue, Confluence page, or Web link for the issue selected. |
✅ | ❌ | Sort issues | Opens the sort issues dialog, where you choose the issue field to sort by, as well as the sort order. Issues can be sorted by issue key, creation date, issue summary, issue type or priority. Select Sort to perform the operation. This operation is disabled while the tree is still loading. Only issues directly contained in the selected issue are sorted. |
✅ | ❌ | Get URL | Creates a URL for the selected folder or requirement. Opening the URL in a browser displays the project tree with the folder or requirement preselected. |
❌ | ✅ | Open in Confluence | Opens the linked page in Confluence. |
✅ | ✅ | Cut | Stages one or more folders or requirements for pasting within the same project. |
✅ | ❌ | Copy | Stages one or more folders or requirements for copying within the same project or to a different project. If a filter is applied to the tree, only issues that satisfy the filter are included in the staged items. |
✅ | ❌ | Paste | Pastes staged items to the selected folder, as follows:
This operation is disabled while the tree is still loading. |
✅ | ✅ | Remove | Opens the remove issue/page dialog. Removing issues from the tree will remove all its child issues recursively. Issues will not be deleted in Jira and can be added again to the tree. |
Multiple select operations
Bulk Edit | Opens a new tab that redirects to the Jira Bulk Edit view. |
Cut | Stages one or more folders or requirements for pasting within the same project. |
Copy | Stages one or more folders or requirements for copying within the same project or to a different project. If a filter is applied to the tree, only issues that satisfy the filter are included in the staged items. |
Remove | Opens the remove items dialog to confirm removing items from the tree.
|
Drag and Drop Operations
This operation is disabled while the tree is still loading.
The project tree supports the following drag and drop operations:
Change folder positions
Change the folder hierarchy
Change the position of requirements, pages, and folders
Move requirements, pages, and folders around the hierarchy
Create and remove child requirements
Change the order of child requirements
Move child requirements around the hierarchy
Tree Filter
To filter the issues in the project tree, select the Filter button just above the detail view to open the filter dialog:
Basic: Filter the issues in the tree based on your selected Project, Type, Status, and Assignee values. Text search is also possible by entering a value in the text field. ("More" fields will be supported in later R4J versions.)
Filter: Use predefined Jira filters. (Only Managed Filters from the following categories can be selected in the Filter picker: Filters shared with current requirements project, as well as filters in “My“, “Favorite“ or “Popular“.)
Advanced: Directly enter the desired JQL to use as filter.
After configuring the filter, select the Search icon to apply the filter to the tree. To undo the filter, select Clear.
The current filter is reflected in the browser's URL for convenient sharing.
Quick
FilterFilters
In the filter dialog, the quick filters defined by project administrators can then be used by project users independently instead of, or in addition with to, the Basic, Filter, and Advanced filters in the tree view. If you don’t see your the desired quick filters in the dialog, request your project administrator to create some.
Select one or multiple quick filters to combine in your search.
Each filter selected is combined with an “AND“ operator.
Tree Settings
To access the project tree settings dialog, click on the Settings button on the top right of the view. The following options are available:
Auto numbering for tree folders | Toggle to add automatic numbering to folders in the tree and the reading view. |
Show issue tooltips in tree | Toggle to show tooltips with issue information. |
Remember tree selection | Toggle to show the last viewed folder or issue when loading a project tree. |
The plugin version is also displayed in the Settings dialog.
Keyboard Shortcuts
Del: Opens the Remove Issue dialog for the item.
e: Edit an issue.