System Requirements
Office 2010 and above
.net Framework 4.6.1 or newer
Supported Protocols
TLS 1.0, 1.1 and 1.2 network security protocols
Configuration of Jira connection
Steps to setup connection:HTTP and HTTPS
| Table of Contents |
|---|
Configure the Jira connection
Download and install R4J Microsoft Excel add-in.
Go here to get the latest version.
If any problems occur during installation, install Visual Studio 2010 Tools for Office Runtime and try again.
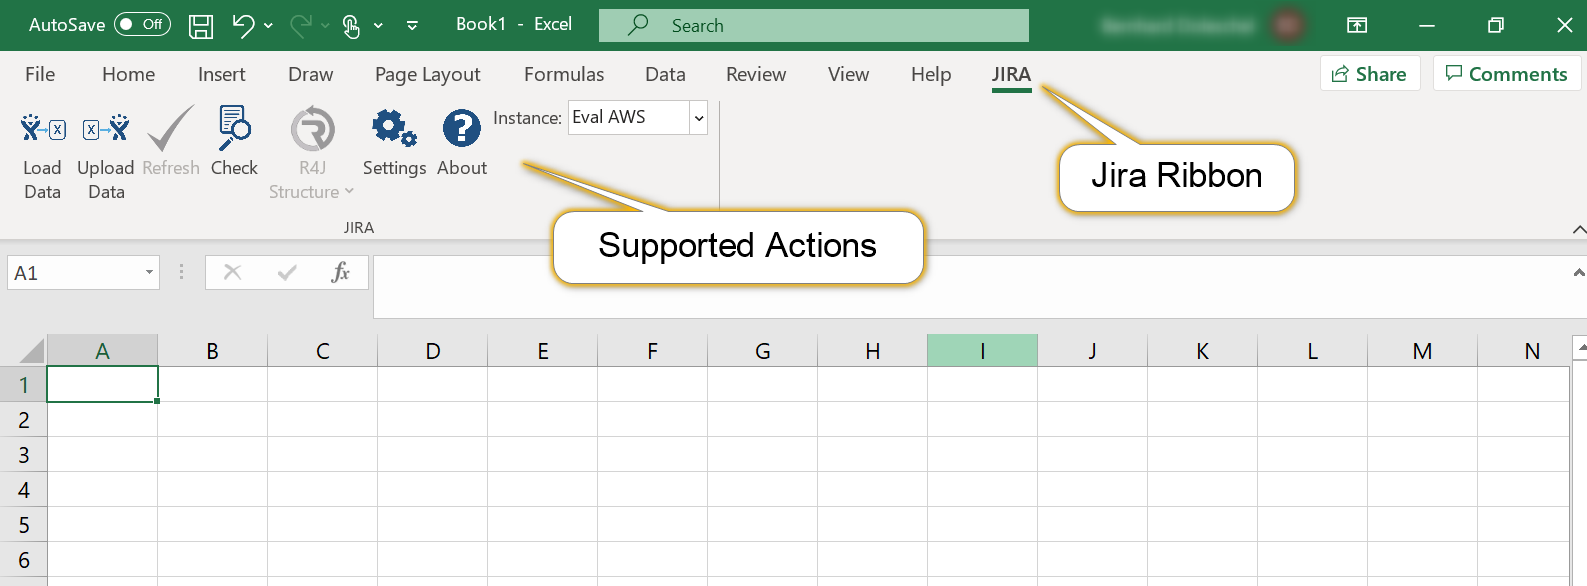
Open
Microsoft Excel and check if the Jira ribbon is now available
:
Select the Settings option under the Jira ribbon. To connect, enter
the Jira server
URL, login
user name, and password. It is possible to connect to different instances of Jira servers.
(However, only one instance can be active at a time.)
Select the Test button in the Settings dialog to check if the add-in can successfully connect to
the given instance of Jira
.
Load Jira Issues in Excel
Select Load Data under the Jira ribbon.
There are 3 available options to
select Jira issues
for import into an Excel spreadsheet.
Project: Select a project from the list.
Saved filters: Select the Filters tab and
choose a filter from the list.
JQL: Select the JQL tab and enter
a JQL query.
The expression can be validated before proceeding.
Select Next.
Select the Jira fields to include in the import
.
Key, Project key, Issue
Type and Summary are
required for the import. (The choice of fields is saved for future sessions.)
Select Finish.
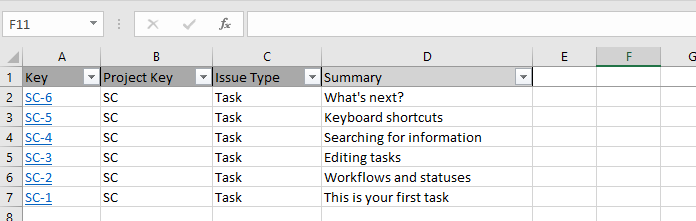
After
downloading the data, the Jira issues
are displayed in the
worksheet - for example:
The headers have a color scheme
that identifies read-only versus
modifiable fields
:
Dark Gray
: read only
Light Gray
You can easily manage your Jira issues after loading it in Excel. Update issues in bulk or create new issues using previous Jira data.
Note that editable fields are indicated by a light gray header. Refer to the heading color schemes mentioned previously.
Updating Jira issues
- Load the Jira data to be updated.
In order to modify specific fields, select the desired fields upon configuring JIRA fields for import. - Modify the fields of the Jira issue you want to update.
- Use check to view the cells that have been changed. Modified data will have a yellow background.
- After double checking, click Upload Data.
- A Result dialog will be displayed to show the summary of the operation (including whatever errors occurred upon upload).
Creating new Jira issues
- Prepare an Excel sheet with following table headings:
- Required: Key, Project Key, Issue Type, Summary
- Further required fields depend on your project configuration
- Optional: Requirement Path - to assign the new issue to a new or existing path in R4J.
- Further fields as of your project need
- Required: Key, Project Key, Issue Type, Summary
- Fill the table with the Jira data for the new issues to be created.
- Leave the key blank when creating new issues.
- Project key is required to identify in which project the new issues will be created.
- Summary and Issue Type are mandatory system fields in Jira.
- If a required field is not provided on data upload, it will be presented as an error in the Results dialog log after upload.
- Click Upload Data.
- A Result dialog will be displayed to show the summary of the operation.
- To create columns with the required and optional fields, you can use Load Data and configure Jira fields as selected fields. Required fields already selected.
- Issue Links to new Jira issues can be setup by using the Excel line number of the new Jira issue, the used link relation must be valid:
Key
Project Key
Issue Type
Summary
Setup a Parent-Child relation
- Include the Requirement Path into the excel sheet
- For the child item: Repeat the path of the parent item, add the issue ID number as path element (/ID-123)
This works also for new children items.
An valid example
Key
Project Key
Issue Type
Summary
Requirement Path
SC-20
SC
Functional Requirement
Existing Functional Requirement of SandCastle (SC) project
Sand Castle Project/Component Requirements
SC-21
SC
Functional Requirement
Existing requirement, add as child requirement to SC-20
Sand Castle Project/Component Requirements/SC-20
SC
Functional Requirement
New requirement, add as child requirement for SC-21 (nested)
Sand Castle Project/Component Requirements/SC-21
| Info |
|---|
The parent item must already exist in Jira. |
Add values to multi-selection fields
You can assign different values to fields like Labels, Issue Links or version fields when you split the values by new lines. Example:
Key
Project Key
Issue Type
Summary
Labels
SC-25
SC
Functional Requirement
Add Labels and Versions
important
severe
trace from:SC-21
1.0
2.0
| Panel |
|---|
Optional SettingsShow changed values as excel commentsWhen this option is set, performing check on the changes of the Jira data will be put in the comments. Difference between the Jira data and the current excel data will be displayed on the comments. Show elapsed timeThis optional setting will display the elapsed time of each operation.
Show issue key column as hyperlinkThis option will display the issue key column as hyperlink. This will provide easy access to the actual Jira issue in the server. |
Limitations and Known Issues
There is currently no support for OSX planned by Microsoft.
: editable
Comments
Issue comments are displayed as Excel notes.
Settings
The Settings dialog displays the login data for the different Jira instances that have been used. The following global options are available:
Option | Result |
|---|---|
Remember me | Login credentials are saved for future sessions. |
Show changed values as excel comments | Comments noting the changes made by the import are added to the affected Jira issues. |
Show issue key column as hyperlink | The values of the Key column are formatted as hyperlinks to provide quick access to the issues on the Jira server. |
Write Debug Logs | Debugging information is logged. Note that the debug file grows quickly! |
Maximum number of comments per issue | The number of comments that are downloaded from the Jira server is limited to the given number. |
Limitations
Folder headings in the project tree are not supported.
MAC OSX office and Microsoft Office 365 on Office.com are not supported.
The value of the Resolution field of an unresolved issue is empty, following Jira’s practice.
The workflow Status field cannot be modified.
Issue comments cannot be updated or deleted.